A follow-up to Db2 Community Edition
Around the recent German Db2 User Group (DeDUG) meeting, I had some discussions on how to easily test Db2 and options for getting the Db2 Command Line Processor (CLP) up and running. Last year, I blogged about three plus one simple and free ways to test Db2. Later, I tested the Db2 Community Edition for Docker. But, if you only need the local Db2 client because you connect to a cloud database, what would be your options?
You can certainly look at the options described in the documentation for the IBM Data Server Client and Data Server Driver types. What is missing in the list is a containerized Db2 client, similar to the Db2 Community Edition for Docker. During the discussion, someone mentioned that there is a containerized client, IBM Db2 Warehouse client container. So, is it only available as part of Db2 Warehouse? No, but you need an IBM Cloud ID. Let’s take a look at it.
Get, set up, and run the Db2 Warehouse client container
In the following are the steps I performed to obtain (pull) the container image, set it up, and run the Db2 client, including connecting to Db2 on Cloud. I mostly followed the steps documented in Deploying the IBM Db2 Warehouse client container.
-
Log in to IBM Cloud:
ibmcloud login --apikey @~/some-temporary-file-with-apikeyThe original instructions don’t use the IBM Cloud CLI, but go with the
dockerorpodmancommand. I still have that installed and so the next step differs, too. -
Set the region for the IBM Cloud Container Registry to
global, then log in:ibmcloud cr region-set global ibmcloud cr login -
Once logged in to the container registry, pull the container image with the Db2 client:
podman pull icr.io/obs/hdm/db2wh_ce:v11.5.9.0-cn1-db2wh_client-linuxI took the image version from the documentation. Very likely that the version will change over time. Adapt it.
-
Once the image is local, I can start or run the actual container based on the image:
podman run --replace -dit --privileged=true --net=host -v /home/hloeser/db2client:/mnt/clientdir --name=db2client icr.io/obs/hdm/db2wh_ce:v11.5.9.0-cn1-db2wh_client-linuxI use the
--replaceparameter to be able to restart the container without problems. The directory “db2client” in my user directory holds the configuration and other data across the sessions and container runs. Note that I added--privileged=trueto give extended privileges to the container. This is different from the documentation, but IMHO required (and I am clarifying it with the development/documentation team). -
With the container up and running, the following then logs me in to the actual CLI environment:
podman exec -it db2client cli
Catalog the Db2 server and database
With the Db2 client in place, I wanted to utilize it for querying my (free) Db2 on Cloud database. Thus, I needed to catalog the Db2 server (TCPIP Node) and the database. The steps have not much changed since my blog post Mom, I joined the cloud.
-
First, catalog the Db2 server. I provide the generic syntax and an example:
db2 catalog tcpip node db2_node_name remote db2_server_hostname server db2_server_port security SSLNote that you have to specify
security SSLif the connection uses TLS encryption. And here an example with values instead of placeholders:db2 catalog tcpip node db2cloud remote db2-ibm-cloud-05.databases.appdomain.cloud server 33113 security SSL -
Next is to catalog the database. I added
authentication server_encrypt, knowing the Db2 server configuration. You might need to adapt it.db2 catalog db database_name as alias_name at node db2_node_name authentication server_encryptHere is an example with values instead of placeholders.
db2 catalog db bludb as clouddb2 at node db2cloud authentication server_encrypt
The above commands should give an output as shown in this screenshot:

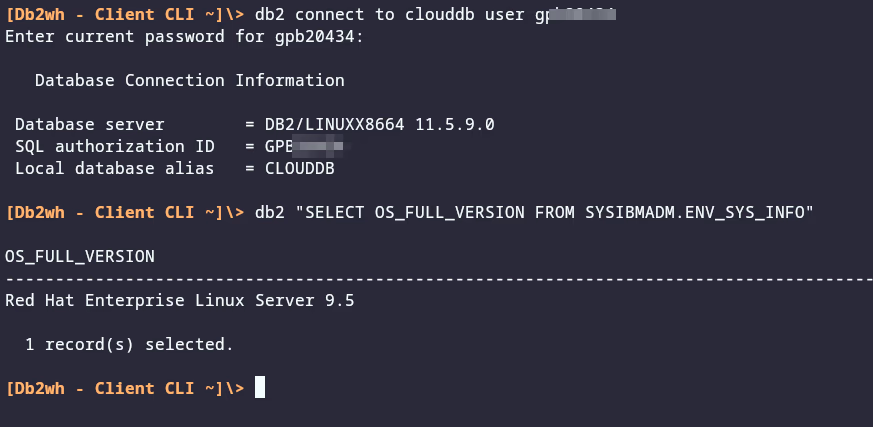
Once you have configured the Db2 server and database, you can connect to it and run SQL queries. See the screenshot at the top of this blog post.
If you have feedback, suggestions, or questions about this post, please reach out to me on Mastodon (@data_henrik@mastodon.social) or LinkedIn.